
HashiCorp's Licensing Shift: Impacts on Customers and the Industry
In the dynamic world of software, change is inevitable. Companies constantly adapt to meet new challenges, harness fresh opportunities, and evolve with the technological landscape. One area where this often manifests is in the choice of licensing. Recently, HashiCorp, a leader in cloud infrastructure automation software, announced a significant shift. They've chosen to transition their source code license for future releases of their products from Mozilla Public License v2.0 (MPL 2.0) to the Business Source License (BSL, also known as BUSL) v1.1.
This impacts all of HashiCorp’s suite of products including Terraform, Packer, Vault, Boundary, Consul, Nomad, Waypoint, and Vagrant.
But what does this transition mean for the industry, and more specifically, for HashiCorp's diverse array of customers? Let's delve in.
Understanding the Licenses
Before dissecting the impacts, it's essential to understand the licenses themselves.
The MPL 2.0, under which HashiCorp has previously licensed their software, is a free and open-source software license. It allows users to freely use, modify, and distribute the software, with the primary condition being that modifications to the original MPL-covered code be made available under the MPL as well.
On the other hand, the BSL is a bit different. This license restricts the use of the software in specific commercial ways, typically for a set period, after which it transitions to an open-source license. The BSL aims to strike a balance - to provide the software company with commercial benefits while ensuring that the software becomes fully open-source after a defined period.
Impact on Customers
1. Monetization and Commercial Use: With BSL, there might be restrictions on how customers can use the software commercially. For instance, direct monetization or offering services around the product might come with conditions, or perhaps even fees, depending on the specifics of the BSL terms.
2. End Users: There is no impact on end users using these products for internal or personal usage.
Impact on the Industry
1. Rethinking Open Source: HashiCorp's move could prompt other companies to reconsider their licensing strategies. The BSL offers an interesting compromise between fully proprietary and open-source licenses. As more firms witness its effects on HashiCorp's business model, they might be inclined to adopt it, leading to a broader industry shift.
2. Innovation and Collaboration: MPL 2.0 thrives on collaboration, with modifications mandatorily made available to the community. With BSL, there might be a reduced immediacy to this shared innovation, but only for a set period. After transitioning to an open-source status, the collaborative benefits return.
Learning from Precedents: Other Software Licensing Shifts
HashiCorp's decision to change its licensing strategy isn't unique. Over the years, several software firms have modified their licensing terms, largely driven by the need to strike a balance between open-source principles and business sustainability. By studying these historical shifts, we can gain insight into the potential repercussions of HashiCorp's decision.
Several notable software projects and companies have undergone similar transitions:
Redis: While the core Redis database remains under the BSD license, Redis Labs introduced the Redis Source Available License (RSAL) for some extended modules. This move was an attempt to deter cloud providers from profiting from their work without contributing back.
MongoDB: Originally under the AGPL, MongoDB unveiled a new license called the Server Side Public License (SSPL). This change was motivated by the desire to ensure cloud providers offering MongoDB as a service would also open-source their accompanying service code.
Elasticsearch and Kibana: Elastic NV switched the license for both from the Apache 2.0 License to the SSPL, mainly due to concerns about large cloud providers, especially AWS, commercializing their open-source products.
CockroachDB: Initially released as open source, CockroachDB later adopted the Business Source License (BSL) to limit third-party commercialization.
MariaDB: While the core MariaDB server remained GPL v2, MariaDB Corporation introduced BSL for certain enterprise features.
TimescaleDB: Adopting a dual licensing approach, core features are available under the Apache 2.0 license, while some components adopted the Timescale License (TSL) to prevent offering the software as a cloud service.
Each of these decisions led to intense debate within the respective software communities. While the essence of open source revolves around collaboration, freedom, and transparency, software companies must also grapple with sustainability challenges. Often, these firms face competition from large cloud providers who can offer these open-source tools as managed services, sometimes without significant contributions back to the project.
Incorporating such licensing changes usually results in two primary outcomes:
Business Protection: Companies can shield their business models, ensuring consistent revenue streams that fund further development and innovation.
Community Backlash: The open-source community is passionate and protective of its principles. Any perceived departure from these ideals can lead to skepticism, concern, or even forks of the project.
For HashiCorp's stakeholders, understanding these precedents can offer valuable context. The balancing act between being open and ensuring profitability is tricky, and HashiCorp's latest decision is just another chapter in the evolving story of open source in the business world.
A Way Forward
HashiCorp's decision is emblematic of an industry in flux. As software companies grapple with the challenges of sustaining innovation while ensuring financial viability, new licensing models like the BSL might gain prominence.
Tools that are built with HashiCorp’s code will have to fork the latest versions and continue to build features, improvement, bug fixes, and security patches themselves. As an example, after Terraform 1.5.5 companies will be unable to incorporate the source code or embedded or distribute newer versions of Terraform. Another option for tools built on HashiCorp’s code will have the option to partner with HashiCorp to continue getting updates and pay HashiCorp for that option.
It remains to be seen how this licensing experiment plays out, but it's evident that the industry is set for some transformative times ahead.
Resources: HashiCorp Annoucement
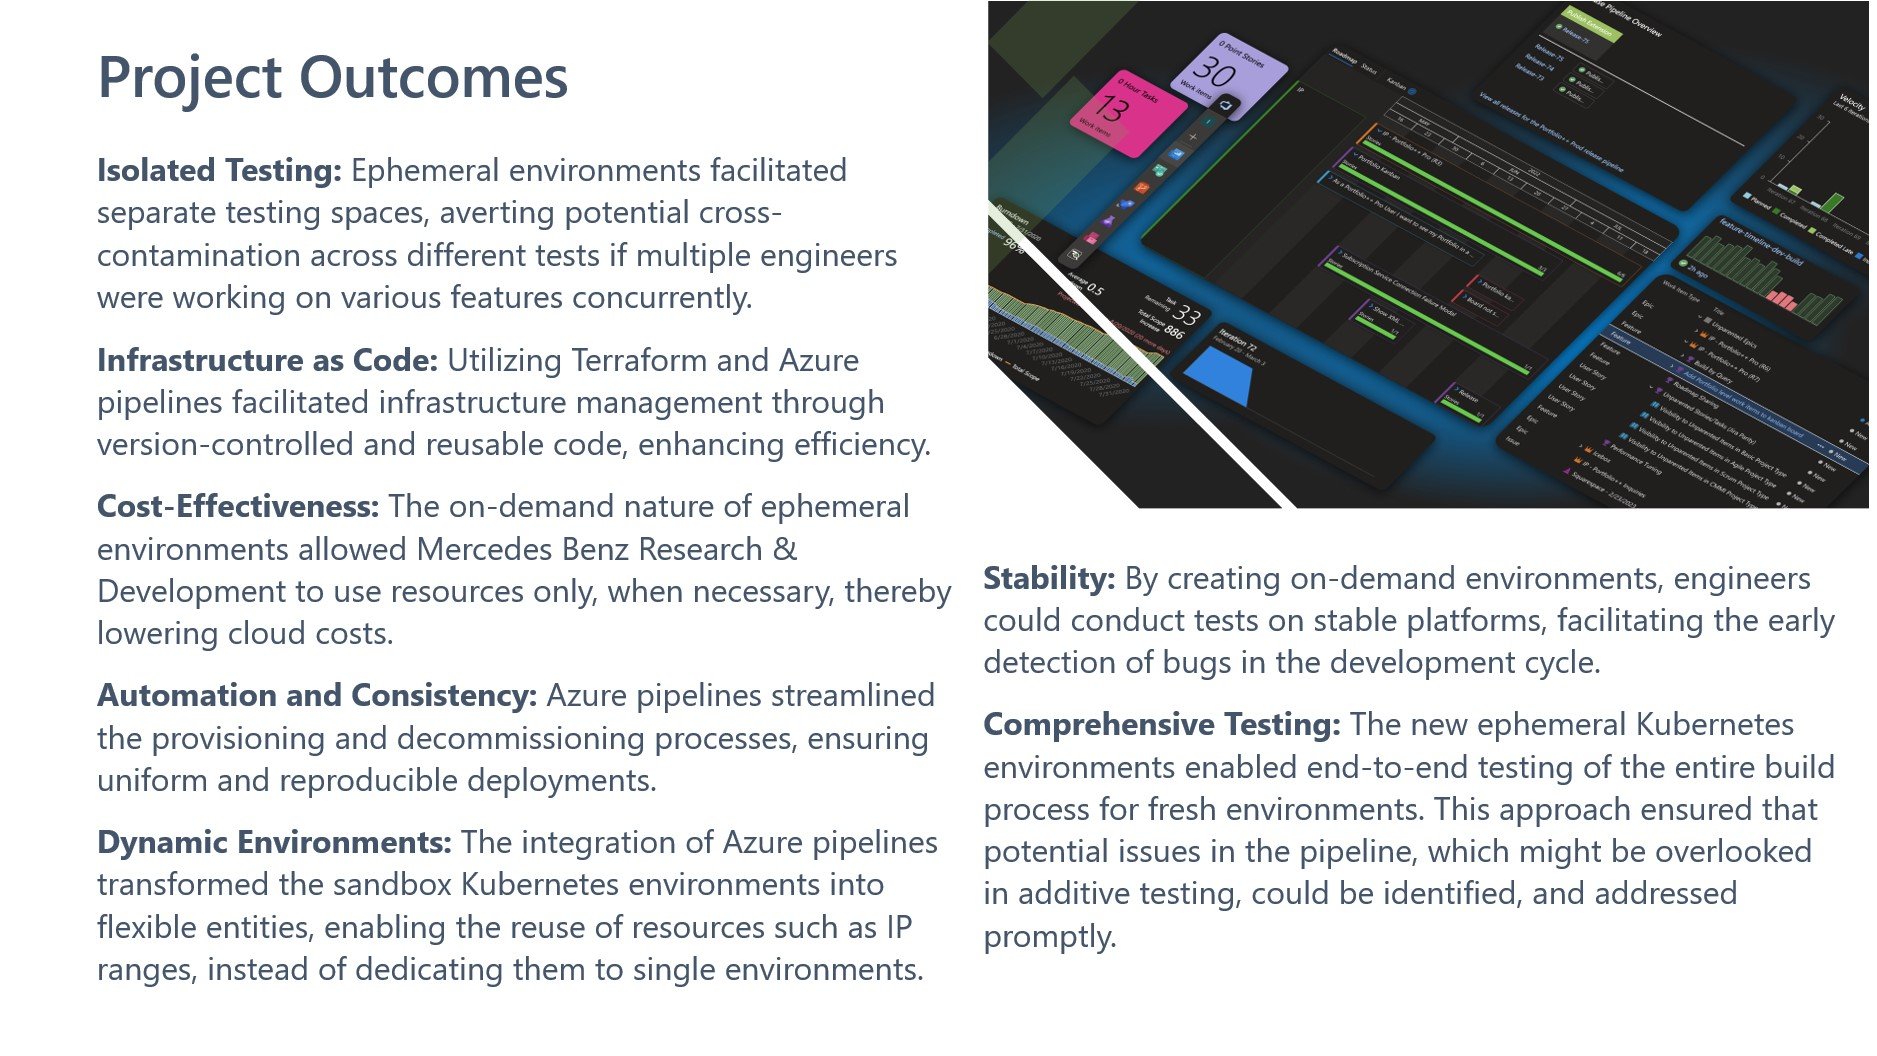
Ephemeral Kubernetes Environments at MBRDNA
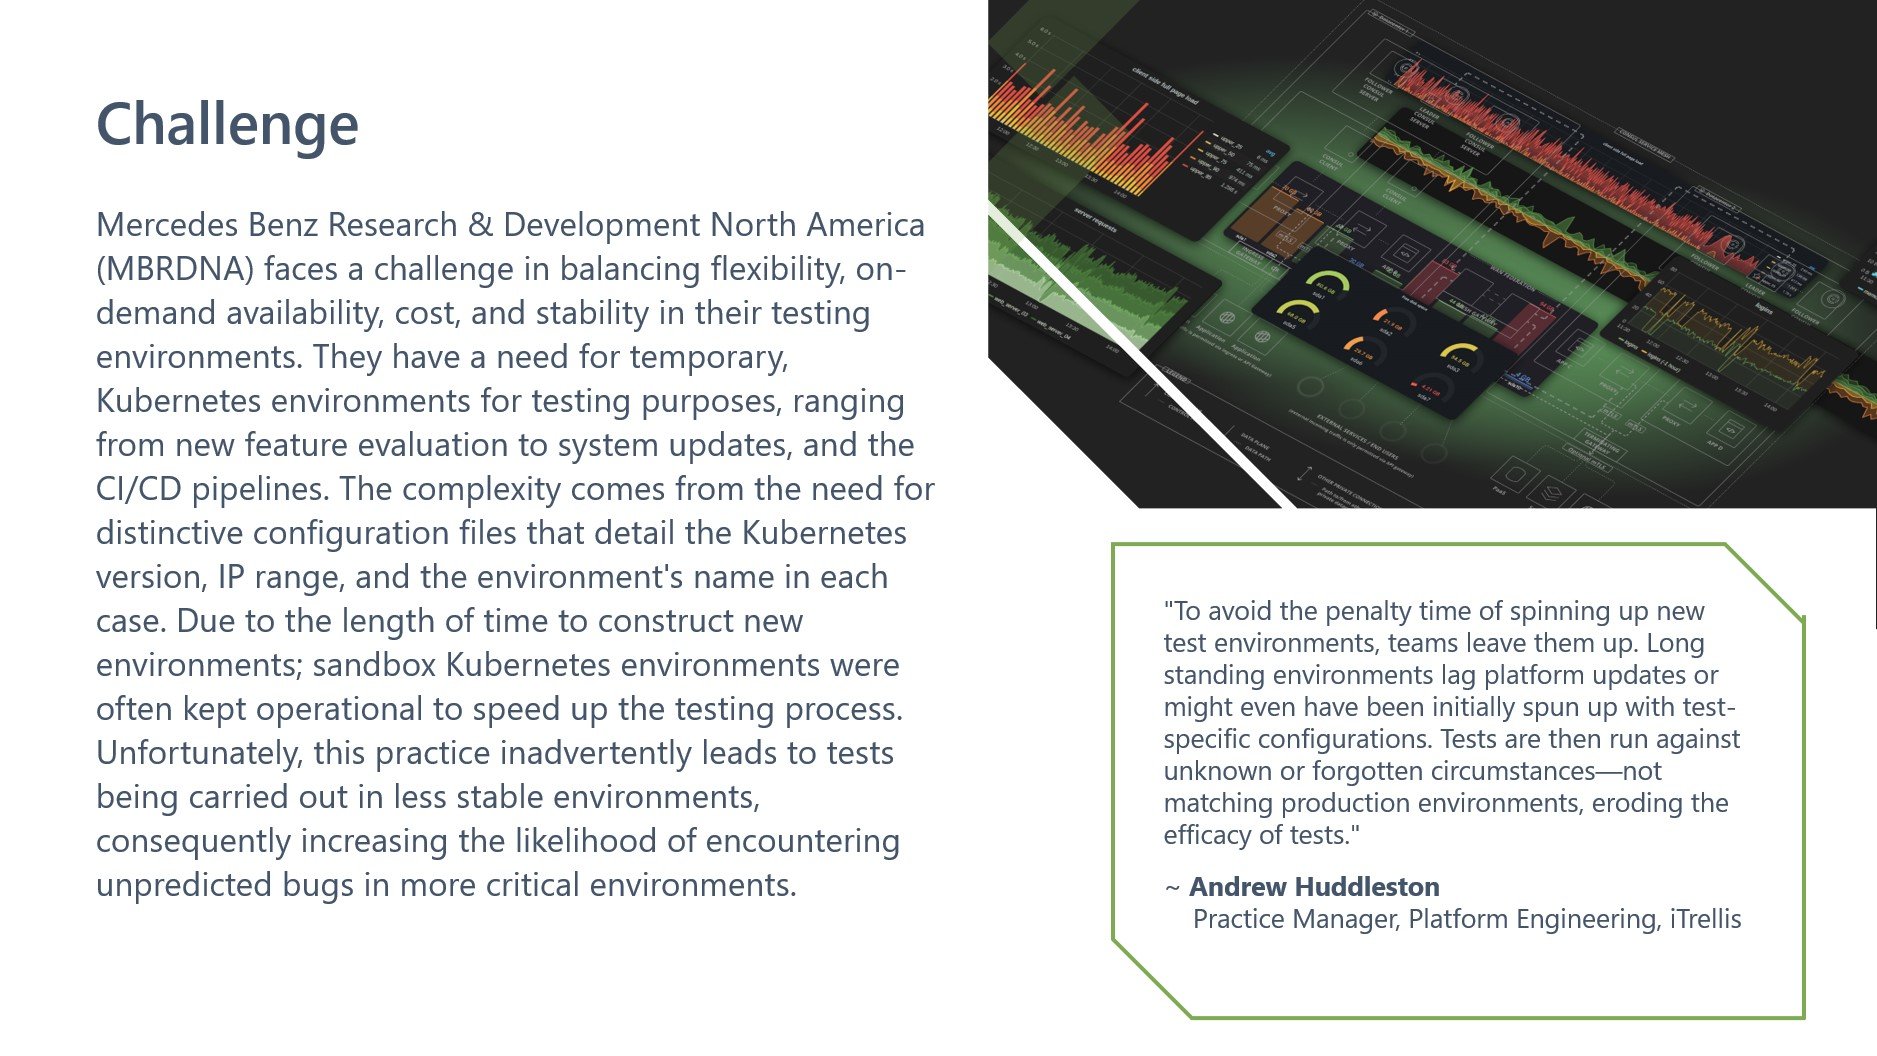
Mercedes Benz Research & Development North America (MBRDNA) faces a challenge in balancing flexibility, on-demand availability, cost, and stability in their testing environments. The following case study illustrates how iTrellis assessed the need, defined the problem, and built a platform-based solution.
Get Docusaurus Running on Azure Static Web App
Docusaurus is a popular open-source static site generator that is designed to make it easy to create and maintain documentation websites. In this blog, we'll cover the steps for getting Docusaurus up and running on Azure Static Web Apps with Azure Active Directory (AAD) authentication.
Why Docusaurus & Azure Static Web Apps?
Docusaurus is an easy-to-use documentation website builder for documentation. It is well documented on their website https://docusaurus.io/ with installation instructions and a discord channel if you have questions. It is easy to get started with and requires minimal setup and configuration. Docusaurus also has several features that make it well-suited for documentation websites, including support for Markdown, versioning, search, and localization.
Azure Static Web Apps is a fully managed service that allows you to deploy static web applications to the cloud. A static web app is a web application that is built using only static files, such as HTML, CSS, and JavaScript. One of the main benefits of Azure Static Web Apps is the ability to automatically build and deploy your web application from a Git repository, such as GitHub or Azure DevOps. This allows you to update your web app quickly and easily, without the need to manually upload files or perform manual deployments. Azure Static Web Apps also provides several features that can improve the performance and security of your web application. These features include automatic SSL certificate management, custom domain support, and the ability to enable Azure Active Directory (AAD) authentication.
Requirements
First there is a few things you need to get this up and running
A Git repository, such as GitHub or Azure DevOps, this example will be using Azure DevOps
An Azure Subscription where you can host your Azure Static Web App. If you don’t have a subscription you can play with, here is a link to create a free account
Tools to install locally:
For MacOS:
Brew, link to install here
You need this to install the other tools
Node.js
You need this to test Docusaurus locally
brew install node
Yarn
You need this to test Docusaurus locally
brew install yarn
For Windows:
Getting Docusaurus up and running
I will outline here how to install Docusaurus, but here is the link to their install instructions for the latest instructions.
In your Git repository, run the following steps:
npx create-docusaurus@latest www classicNOTE: This creates a www folder, you can name this whatever you would like
cd wwwnpx docusaurus startThis will run the website locally and open your browser so you can see it running and what it looks like
Prepare it for deployment to Azure Static Web Apps:
In a different terminal window or ctrl-c the local run in the previous step:
npm run buildThis will create a build repo
This step can sometimes fail looking for dependencies, but
yarn run build
did work for me when that happened
Creating Azure Static Web App
Open the Azure Portal and sign in
Type Static Web App in the Azure Search at the top, and click Static Web App under Services
Click + Create
Enter in the required fields, see our example below:
For Plan type if you want to do Azure AD authentication like we are doing in this example you need to use the Standard tier
For App Location make sure you put the same folder from step 1 of getting Docusaurus up and running. In our example we are using www but this could be named whatever you would like.
For Build Presets it must be React, because Docusaurus is built with React
NOTE: As you can see in our example, we are using Azure DevOps which if you are using the same login for Azure DevOps as the Azure Portal you won’t need to do anything extra, your repo will show up. If you are using GitHub, you do have to auth to GitHub for Azure to be able to see your repositories
Click Review + create to finish creating your Static Web App
After your Static Web App finishes creating you should see a URL that Azure generates for you. If you browse that you should see your Docusaurus Site up and running on the internet for anyone to see.
Troubleshooting
If your site doesn’t come up when you build it with the Static Web App, click on the Azure DevOps pipeline under Deployment history
NOTE: This will be in the same place “Deployment History” if you use GitHub it will just be named different
In the Pipeline run you could see if you can see if there are any errors to see what is causing it to fail. Most likely it is because the npm run build failed. You can try to run this locally like we did in the Docusaurus section above, if it works locally it should work in the pipeline but make sure to read any errors which will tell you why its failing.
Updating your site
To update the Docusaurus site; adding new docs, rename things, styling, formatting, etc. It is very simple, make the changes locally, I recommend using an IDE like VS Code or something similar so you can preview the Markdown files before you push it up. You can also see your changes running it locally
After you make your changes make sure to do the following:
Run the site locally to make sure it looks like you want and builds correctly and so the pipeline doesn’t fail.
In case your forgot how to do that:
cd wwwnpx docusaurus start
Run npm run build or yarn run build locally to make sure it builds, again so the pipeline doesn’t fail
Once your changes are finalized just push it up to the branch you pointed your Static Web App to and the pipeline will auto redeploy the changes so your Static Web App, and you should see them when you go to your URL shortly.
Azure also has something called Preview Deployments, when you make a pull request to the branch you point Static Web App to it will create a preview deployment that you can browse before its merged into the main branch.
OPTIONAL: Setting up Azure AD authentication to your Static Web App
To add Azure Active Directory Authentication to your Static Web App, follow the below steps:
First thing you need to do is create and App Registration in Azure.
Search App Registration in the Azure Portal and click App Registrations under Services
Click + New Registration
Fill out the form
Name it whatever you would like
For Supported account types, select Accounts in this organizational directory only
This will only allow people in your active directory to access your static web app. If you want to lock it down more see the next section
For Redirect URI make sure you put the URL of the Static Web App but with auth added
Example: ` https://<your_url>/.auth/login/aad/callback`
After your App Registration is created, open your app registration
Click Authentication on the left menu
Under “Implicit grant and hybrid flows” make sure to enable both Access Tokens, and ID Tokens
Now click Certificates & secrets in the left menu
Click + New client secret
Give it a Description and Expiration
This will give you a Value and Secret ID, make sure you copy the down somewhere as you will not be able to retrieve it again once you click off this page.
Next click Overview on the left menu
Copy down Application (client) ID somewhere, you will need it in the next step
While you are here, copy down Directory (tenant) ID you will need it later.
Now your App Registration is ready for you Static Web App we need to configure your Static Web App to use said App Registration
Go back to your Static Web App in the Azure Portal
Click Configuration in the left menu
Click Add
Name this one AZURE_CLIENT_ID
The value should be the Application (client) ID you copied above
Click OK
Click Add again
Name this one AZURE_CLIENT_SECRET
The value should be the value of the client secret you created in the App Registration
Click OK
Click Save at the top of the page
Finally, we need to configure Docusaurus to use these values to authenticate to Azure AD
NOTE: Yes, for the keyboard heroes it is technically still configuring the Static Web App but it in the code of your Docusaurus repo so, semantics
Go back to your local code repository
Add a file in the root of your application (in this example it is in the www folder) and name it staticwebapp.config.json
Copy our example below, the only thing you need to change is line 19 (openIdIssuer) you need to your Tenant ID that you copied in Step 1 of this section above
{
  "routes": [
    {
      "route": "/*",
      "allowedRoles": [ "authenticated" ]
    }
  ],
  "responseOverrides": {
    "401": {
      "statusCode": 302,
      "redirect": "/.auth/login/aad"
      }
  },
  "auth": {
    "identityProviders": {
      "azureActiveDirectory": {
        "userDetailsClaim": "http://schemas.xmlsoap.org/ws/2005/05/identity/claims/name",
        "registration": {
          "openIdIssuer": "https://login.microsoftonline.com/<tenant_id>",
          "clientIdSettingName": "AZURE_CLIENT_ID",
          "clientSecretSettingName": "AZURE_CLIENT_SECRET"
        }
      }
    }
  },
  "globalHeaders": {
    "Cache-Control": "no-cache"
  }
}
Once you have this file, you can push this up to your branch that your Static Web App is running on. Like I stated in the Updating your site section, once you push the code to the branch that your Static Web App is running on the Azure Pipeline will automatically redeploy your site with changes. Now your Docusaurus site now have Azure AD Auth on it so only people in your organization can access it and they will have to Authenticate to Azure to see it.
OPTIONAL: Custom Domain Name
If you don’t want to use the generated name that Azure gives you, you can create a Custom Domain Name for your Docusuarus website. Follow the below steps:
Open the Azure Portal
Search for DNS Zones and click DNS Zones under Services
Click + Create
Name it whatever you would like for your domain name
Navigate to your Static Web App in the Azure portal
Click Custom domains on the left menu
Click + Add
Click Custom domain on Azure DNS on the sub menu that pops up
On this Menu:
For Domain name: Name it the same as the DNS zone you create
For DNS Zone: Select your DNS zone you created earlier
Wait for it to Validate, it will take a while, but it will create a CNAME record, TXT record, and an Alias for your static web app for you in the DNS Zone you created.
NOTE: If you are using Azure AD Auth, you will need to update the Redirect URI for your App Registration once you have your new custom domain name.

Things We Do to Improve Delivery

Today I was asked the question: "What does iTrellis do well when it comes to building software?"
I have been developing software now for 11 years, and I have spent 7 of those years as an iTrellis consultant. During this time, I have been a part of many different iTrellis teams. One must adjust quickly to new coworkers, managers, tools, and technologies – and having a culture that encourages teamwork, collaboration, and communication really helps.
When left to ponder the question about what we do well, I realize the question is really “how do we make sure we are successful”, I arrived at the following 3 items:
Documentation
Cadence, Collaboration, and Communication
Delivery Focused
Documentation
Whether it is a blank canvas or an existing implementation, documentation is important. Our documentation describes the purpose of the software, provides context for use, and a roadmap for development and support. Our documentation is not only for developers, but also management. Up-to-date documentation will also help new team members ramp up faster. I have found the following types of documentation to be useful on projects:
Application Architecture Schematics
Show every component of an application, what services are communicating with them, relationships between components and then use these schematics to express differing aspects of development, for example:
Chart Use the schematic as a conversation guide, helping developers to communicate clearly, remove ambiguity, and reach agreement when it comes to things like mapping state or user flows.
Sequence Diagrams
Help to decompose key features of the software into individual function calls, helping engineers agree to the scope of the work, what each function will do, and how services will communicate with one another.
sequenceDiagram
    Wordpress->>+API: Sync album 1234
    API->>+Service: Process album
    Service->>+ProcessedAlbumRepository: Check if album has been processed
    ProcessedAlbumRepository->>-Service: ProcessedAlbum status or null
    Service-->>ProcessedAlbumRepository: Insert / Mark album as Processing
    Service->>+ContentRepository: Get album images
    ContentRepository->>-Service: Return album images
    loop Process Images
        Service->>+Image Processor: Process image
        Image Processor->>ImageDZIRepository: Get / Insert image DZI entry
        ImageDZIRepository->>Image Processor: Return image DZI entry
        Image Processor->>Image Processor: Download image to process
        loop Reszie and tile Image
            Image Processor->>Image Processor: Create tiles
        end
        Image Processor->>Image Processor: Create meta data files
        Image Processor->>Image Processor: Delete main image
        Image Processor->>+Azure Blob Storage: Upload metadata and tiles to blob
        Azure Blob Storage->>-Image Processor: Return status
        Image Processor->>Image Processor: Update ImageDZI Entry
        Image Processor->>Image Processor: Cleanup directories
        Image Processor->>-Service: Image processed
    end
    Service->>+ProcessedAlbumRepository: Update ProcessedAlbum entry
    ProcessedAlbumRepository->>-Service: Return ProcessedAlbum entry
    Service->>-API: Return status
    API->>-Wordpress: Return status
Gantt Charts / Roadmaps
Being able to show what's completed and what is future work helps to get team consensus on scope, and plan the work remaining
Our desire for this type of tool led iTrellis to build and publish Portfolio++, an extension to Microsoft Azure DevoOps that provides Gantt chart capability to Azure DevOps, which is now used by development teams around the world.
Cadence, Collaboration, and Communication
Effective communication and teamwork are critical components of successful software development. Following a development cadence is one piece of the puzzle. iTrellians prefer iterative development with frequent deliveries to help keep us on track. Given the choice, we practice the Scaled Agile Framework (“SAFe”). SAFe promotes incremental development, where we break down work into manageable chunks that can be completed within each development iteration. This helps to ensure that we are consistently delivering value to our customers, and that the projects are always moving forward. Continuous delivery builds trust and confidence across team members, and in turn, our clients.
The Scaled Agile framework also promotes collaboration and clear communication through frequent meetings. For one, it helps to reduce the risk of project failure by ensuring that everyone is on the same page and working towards the same goals. It also promotes a culture of continuous improvement and teamwork, allowing us to learn from our mistakes and celebrate incremental deliveries along the way. At iTrellis, we have found that our ability to communicate effectively and work together as a team has been instrumental in our success.
Delivering Software
iTrellian consultants are quick studies. Because of this, we often become the "jack of all trades" on our client engagement teams. While most of our consultants are engaged because of a particular expertise, iTrellians are also often the “figure it out” team members. iTrellis is composed of many talented individuals who have a wide range of skills and decades of experience delivering software. We leverage this experience through “chat” tools like Slack, where iTrellians help each other through the congress of opinion on what works and what doesn’t.
I have collected a set of patterns, languages, and frameworks that have proven successful. I have made a name for myself as an expert on the “front-end” of development projects and I like to help my teammates. I believe that while it is fun and exciting to use modern technologies, going with proven solutions usually works best for my co-workers and clients. My goal is to leave a client in a better place than where I found them, and I am confident in the solution I have built or the advice I have given. Being able to pull from this toolset allows me to start new projects or give advice that provides quick results. This goes both ways, and other iTrellians share their best practices with me – which in turn leads to well architected solutions “end to end”.
Conclusion
By producing high-quality documentation, adhering to a development cadence, and sharing best practices, we have been able to build a culture that values and demonstrates collaboration and continuous improvement. As a result, our culture helps to attract and retain top talent.

Automated Application Testing using Selenium
I was recently onboarded onto a project to automate testing of a web application using Selenium. On my previous projects, I have written many unit tests, but end to end testing was a first-time experience.

I was recently onboarded onto a project to automate testing of a web application using Selenium. On my previous projects, I have written many unit tests, but end to end testing was a first-time experience.
As a software developer, you are always reminded how important it is to thoroughly test your code. That is why I was excited to use automated testing tools and learn of their value. Automating tools such as Selenium allow you to run tests with ease, so you can catch bugs and ensure that your code is reliable. This also means that it is important for the tester to understand the user’s intentions so that tests are written in ways that mimic a user’s path throughout the application.
The tool I’m using for automating testing is Selenium, a popular open-source testing framework that lets you automate web browsers and user actions within them. Selenium can be used with multiple languages, and I’m using Python. Here are a few things I learned while automating testing for an application using Selenium.
1. Start With a Solid Foundation
Before you start automating tests using Selenium, it's important to have a solid foundation in place. Walk through the scenarios and think about the processes to automate as well as the assertions you will be making within your tests. This also means making sure you understand your application’s design and structure, analyzing HTML tags, CSS classes, and IDs. This will make it much easier to write tests that are reliable and maintainable.
2. Don’t Give Up, Be Patient
Automated testing using Selenium can be a bit inconsistent at times. I ran into issues where tests failed unexpectedly many times in my project, or where the test results were incorrect. Whether it was due to timeouts or external services causing errors, it can be frustrating when this happens, but it is important to be patient and persistent. Take the time to understand what and why it went wrong. Most importantly, don’t give up and try alternative approaches until you find a solution that works. This means writing more recovery code such as retry code in case of failure.
Take for example the code snippet below, a scenario where you wait for iframe to load within a page. I was able to identify that this is a common point of failure due to slow network when running this inside Azure Pipeline so this was a perfect place to add a retry strategy to ensure that the test is less flaky and more consistent.
tries = 1
while (tries <= 5):
    try:
        iframe = WebDriverWait(driver, 10).until(
            EC.element_to_be_clickable((By.CLASS_NAME, "external-content--iframe")))
        tries = 6
    except TimeoutException:
        tries += 1
Additionally, StackOverflow is a great resource where you could refer to see if any others ran into similar issues!
3. Research the Right Tools
Selenium is a powerful tool. There are many helpful libraries that make writing tests even quicker and easier. For me, using Python as the language for scripting, I used a test runner called pytest to make my tests easier to write and read. This was especially helpful when I had to run my script in Azure Cloud and Azure Devops environments
@pytest.mark.parametrize('password,server', [('itrellis_password', False), ('server_password', True)])
def test_info_and_access_roadmap(driver, password, server, request):
Using the above code as an example, without pytest, I would have to need to write separate test cases for each type of configurations, however using parameterization and fixtures, I’m able to reuse the same test case for both configs and safely pass in the user secrets.
I also used the webdriver-manager library to set up a test environment for various browser configurations. Take the time to research and choose the right tools for your use cases, dependencies, and configurations.
4. Keep Your Tests Modular
As a newcomer in end-to-end testing, I just started to write code without much thought in the beginning. However, as my test suite grew, I noticed patterns in the processes and type of assertions I made that could be grouped together. Then it hit me, just like software development, I could have been making my own code modular so that it is easier to maintain. This was not only for me but for future maintainers. This meant going back to my old code, breaking tests down into smaller, more atomic tests for readability and factoring out common processes into shared methods using good programming practices like encapsulation and abstraction.
Here is an example of using fixtures to handle ADO login versus Azure Cloud Login that I factored out (Look at the previous example to see how values are passed in)
def init_roadmap_settings(driver, password, server, request):
    if server is True:
        value = request.getfixturevalue(password)
        BasePage.login_server(driver, value)  # login
    else:
        value = request.getfixturevalue(password)
        BasePage.login(driver, value)  # login
        # click on the x for upgrade if the pop up comes up
        BasePage.upgrade(driver)
    WebDriverWait(driver, 20).until(EC.element_to_be_clickable(
        (By.ID, "__bolt-addRoadmap")))
5. Be Mindful of Timing Issues
As I started to run the tests I wrote, I came to realize that one of the biggest challenges when automating testing using Selenium is dealing with timing issues. Luckily, Selenium provides several useful methods for wait-states and resolving these issues. I needed to be mindful of things like page load times, AJAX requests, and user input delays when dealing with forms. At first, I was using more implicit waits, but I quickly discovered early on that there are better techniques such as using explicit waits (to make the test wait for the application to catch up with commands) or even polling the DOM for web elements to appear.
Here is a simple example of using implicit wait (Before) and explicit wait (After)
# Before:
    use_percent_button.click()
    time.sleep(3)
# After:
    use_percent_button.click()
    WebDriverWait(driver, 2).until(EC.visibility_of_element_located(
        (By.XPATH, "//div[@class='summary-text' and descendant::span[contains(text(), '%')]]")))
Using explicit wait, you can ensure the conditions you are seeking are met, and save the time in your tests if the conditions are satisfied.
6. Understand Your Test Plans
Just like user stories, there are priorities when it comes to test cases/plans. Not all tests are critical, and some may be trivial. Some tests might be more likely to fail than others. I started automating high priority tests first to ensure the critical bugs are caught as soon as possible so when the application is shipped out, I can feel safe knowing core business logic is sound.
7. Keep Tests Updated
As your application grows and new features are added, the tests will need to accommodate them. Some may require small code changes and some may require a rewrite (e.g., UI update). It is important to have effective communication with the development team to know the types of changes you should expect in the application and adapt the code to them. Also make sure to regularly review and change your tests to ensure that they are still providing value.
Keep these tips in mind, and you will write better tests, and you can assure that the application will be of better quality.
Infrastructure as Configured
Infrastructure is difficult to manage but your code shouldn't be. This article describes basic strategies for Keeping It Simple.
Infrastructure is difficult to manage but your code shouldn't be. Having worked on infrastructure for most of the last 25 years one thing I know for certain is that complexity should be removed wherever possible. The examples I use below are specific to Azure and ARM templates but are applicable to any cloud provider and Infrastructure as Code language. That said, I would like to share some thoughts I have about how to remove complexity without sacrificing functionality.
Whenever possible, you should strive to create a single flat file for each resource that you manage. If you have an Azure SQL database which is running your production subscription, then you should have a single file which contains all of its configuration. This simple approach offers several benefits. First by maintaining a 1:1 relationship between code and resource you ensure that any changes made to the configuration apply to exactly one resource. The configuration changes are declared in an easy-to-read language and the schema for each resource is publicly available. The schema contains every property and value accepted for each resource which makes it is easy to verify. As a reviewer, you know to expect 1 file changed for each resource being updated. Last, if the scope of a change is a single resource, then you can execute the change quickly as it requires a single deployment to a single environment. It isn’t a code promotion, it is applying new configuration. One single flat file per resource makes authoring, reviewing, and deploying changes easier.
When I say a single flat file per resource, I mean to the extent possible you want your code to consist of properties and values only. The point of this approach is to make it absolutely clear exactly what the configuration is supposed to be without interpretation. This really shouldn't be Infrastructure as Code at all. Instead, we should think of this in terms of Infrastructure as Configured. There should be no input parameters, expressions, conditionals, repeat loops, or dynamic references anywhere in your configuration. While these are well understood concepts, they also create complexity which I would argue is more than they are worth.
Input Parameters help ensure a consistent configuration by allowing you to specify attributes that change between resources while keeping everything else the same. This seems like a great idea, however, if you are using them then you are almost ensuring that you will have more than one resource per configuration. When changing an existing configuration or approving a pull request that uses parameters you are forced to acquire contextual information about what that parameter is. You may need to determine its type such as string, int, bool, or object. You may need to understand if the parameter has a default value. It will be necessary to review if there are any validation constraints for potential values. You will also need to determine how these parameters are passed and whether they meet all the above conditions. Obviously, the more input parameters that are defined, the bigger the task you will have to complete. Parameters often become the basis for further complications in your code like expressions and conditionals.
Expressions can provide a lot of functionality, but they also can create some significant challenges. In general, expressions are used to evaluate functions, build formatted strings, create timestamps, generate UUIDs, and other operations. Expressions are used to derive values based on a set of inputs. A typical use case for expressions would be implementing a naming convention for resources based on provided inputs for environment, product, and service. Some resources require uniqueness within the name which can also be achieved using expressions. The challenge this creates is that an expression must be evaluated before we can understand the result. The evaluation of infrastructure code expressions happens in the runtime environment for the cloud provider which we do not have access to. We can only create an expression and run a deployment to see if it succeeds and produces the desired result. This leads to a lot of trial and error that creates overhead.
#Don’t do this
  "parameters": {
      "webAppName": {
        "type": "string",
        "defaultValue": "Acme",
        "minLength": 2,
        "metadata": {
          "description": "Base name of the resource such as web app name and app service plan "
        }
      },
      "environment": {
        "type": "string",
        "defaultValue": "Dev",
        "metadata": {
          "description": "SDLC designation for the environment i.e. dev/test/prod."
        }
      }
    },
   "resources": [
      {
        "type": "Microsoft.Web/serverfarms",
        "apiVersion": "2022-03-01",
        "name": "[format('{0}-WebApp-{1}',parameters('webAppName'),parameters('environment'))]",
         . . .
      }

#Do this instead
   "resources": [
      {
        "type": "Microsoft.Web/serverfarms",
        "apiVersion": "2022-03-01",
        "name": 'Acme-WebApp-Dev',
         . . .
      }
Conditionals, on the other hand, provide a mechanism to do one thing if a certain criterion is satisfied or a different thing if not satisfied. Conditionals let you optionally set values or even create resources based on a set of inputs. Conditionals are often used to handle situations where resources are configured differently in production versus everything else. You may have a requirement to use a D16v5 VM for production but use D4v5 for everything else. While conditionals are not hard, the dilemma we run into is not knowing all the possible options when the conditional is first written. Inevitably, there comes a time when one of those non-production environments needs production quality hardware, or you find out some environments can be made with even less hardware. Often conditionals are used in conjunction with expressions, which makes debugging and troubleshooting even more difficult since we cannot step through the code as we would with a debugger.
#Basic conditional using an expression to determine sizing

#Dont do this
   "variables": {
      "productionSizeHardware": ["prod","staging"],
      "appServicePlanName": "[format(Asp-{0}-{1}', parameters('webAppName'),parameters('environment'))]"
    },
    "resources": [
      {
        "type": "Microsoft.Web/serverfarms",
        "apiVersion": "2022-03-01",
        "name": "[variables('appServicePlanName')]",
        "location": "[parameters('location')]",
        "sku": {
          "name": "[if(contains(variables('productionSizeHardware'),tolower(parameters('environment'))),'P2','S1')]"

#Instead create a separate templates for each environment which explicitly sets the sku, location, name, etc.
For some of the same reasons as conditionals and expressions, you should eliminate repeat loops from your code. Repeat loops are a method of performing a specific operation for each item in a list. A repeat loop might be useful for assigning the same Role Based Access Control to a list of Azure AD groups. It might also be useful for creating several App Service instances within the same App Service plan. The loop saves lines of code by repeating the same code block for each item in our list. However, some tools will have issues if the list ever needs to change. In some extreme cases, this could cause all such resources to be deleted and reprovisioned. Loops also become problematic to maintain should you need to customize one of the resources but not all of them. This leads to the addition of conditionals with inside each loop. A practice which forces us to evaluate the condition for every resource in the list and then validate only the right actions were taken.
References are another thing you should avoid using in general although there is at least one case where you will want to use them. References create complexity because they add an external resource to your config without managing it. For example, to provision and Azure SQL Database you must have an Azure SQL instance. Instead of referencing the Azure SQL instance, you should explicitly provide the resource id. This avoids an external call which will improve the processing time of your deployment. It also avoids a situation where an API version change returns different results. The time to use references is when you need to provide sensitive values like keys, connection strings, and passwords to your infrastructure. Obviously, those should never be exposed in plain text.
The main takeaway here is that maintaining flat files which are easy to read is more important than efficient coding. Sure, you will have many files which are mostly the same, but that really isn’t a problem. Today’s editors make it easy to search across files and replace text which negates much of that problem. In my next post, I will share some ideas about how to achieve consistency with your code by adding IaC tests.
Using a Domain Model for Time in .NET
As a developer, I’ve had to write a lot of code related to dates and time. Time is important. Time is money! Time is on my side; yes it is.
Ok, so .NET provides a number of classes in System for dealing with time, and 3rd party libraries like NodaTime provide even more, which means anything time-related is readily available to today’s .NET developer.
So what exactly is the problem?
The problem is that these libraries don’t know anything about the business domain you’re coding for, and they make it easy to use them inconsistently or even incorrectly. Let’s look at an example.
Have you ever written something like this?
while (true) {
    if (DateTime.Now.Hour == 12 && DateTime.Now.Minute == 0)
    {
        Console.WriteLine("Time for lunch!");
        SetCalendar("Back in 30 minutes.");
        return;
    }
    Thread.Sleep(1000);
}
You run it on your computer and at noon, sure enough, the console message appears and then whatever SetCalendar does executes and all is well. Time to ship! You install it on your Azure VM and at 5 AM your calendar lets you know that you’ve just gone to lunch. Wait, what? DateTime.Now() returns a DateTime object set to the local time for the Windows computer on which it runs, which on your workstation might be Pacific Daylight Time; but on an Azure VM it will be UTC.
You go back to your program and make some adjustments. You know that your time zone is 7 hours behind UTC, so you write a quick and dirty method that takes a UTC time and returns the local equivalent.
private DateTime GetLocalTime(DateTime datetime, int offset)
{
    if (datetime.Kind != DateTimeKind.Utc)
    {
        throw new Exception("Needs to be UTC");
    }
    var local = new DateTime(datetime.Year, datetime.Month, datetime.Day, datetime.Hour, datetime.Minute, datetime.Second, DateTimeKind.Local);
    local = local.Add(TimeSpan.FromHours(offset));
    return local;
}
and update your code to look something like this:
while (true)
{
    var now = GetLocalTime(DateTime.UtcNow, -7);
    if (now.Hour == 12 && now.Minute == 0)
    {
        Console.WriteLine("Time for lunch!");
        SetCalendar("Back in 30 minutes.");
        return;
    }
    Thread.Sleep(1000);
}
Now you run it on the server and it works! Great news. But now this is awkward as you have to remember to use that translation method every time you need a date or time value. Are there times when you wouldn’t want to use it? Are there times when you need to use a different time zone offset?
Enter domain time.
Domain time is simply writing your own custom classes for handling time values which are tailored to your business domain.
Imagine writing something like this instead:
var domainTime = MyDomainTime.FromLocal(TimeZoneHelper.UsPacific);
if (domainTime.IsLunchtime())
{
    Console.WriteLine("Time for lunch!");
    SetCalendar("Back in 30 minutes.");
    return;
}
Thread.Sleep(1000);
Notice a couple of things here.
First, we’re defining the perspective from which the time value has meaning. FromLocal() returns an instance of the MyDomainTime class which then exposes properties and methods that execute from the local time zone’s perspective. Here we’ve passed in a timezone value, but you could also define a default. You can imagine overloads of FromLocal() that maybe take geographical coordinates instead of a timezone, or a database dependency, or even more specific versions like FromEasternDivision() or FromKathysOffice() or whatever, as long as it has relevant meaning in your problem domain.
The other thing to notice is that the actual hour and minute of lunchtime is abstracted away from the consuming code. This suggests that “lunchtime” is a concept with a common meaning across the domain. That is, a concept where you might want to define it once and reuse rather than run the risk of one developer deciding to use noon in one place, someone else using 11:45, etc. Depending on the complexity of the domain, you might expand on this in a Lunch class that exposes different properties and methods dealing with lunch, where that class decorates or otherwise references MyDomainTime to handle the mechanics.
Pretty simple, right?
But now you’ve thought of something. This logic depends on the concept of “now” which is always different. Like “now.” And “now” again. And the second “now” is different from that first “now.” You know? How can you write a unit test for this new domain logic without setting your system clock to 11:59 AM, running your program and waiting a minute?
We can add functionality to our class to override what “now” means by defining our own Now() method that invokes a Func of type DateTime:
private static Func<DateTime> _funcForDeterminingNow;
public DateTimeOffset Now()
{
    var now = _funcForDeterminingNow.Invoke();
    return TimeZoneHelper.GetDateTimeOffset(_timeZone, now);
}
whose default implementation we can set to the standard DateTime.UtcNow property in our static constructor:
_funcForDeterminingNow = () => DateTime.UtcNow;
but which can be overridden with a static method that looks like this:
public static void SetNow(Func<DateTime> nowFunc)
{
    _funcForDeterminingNow = nowFunc;
}
Now in our tests, we can set a “now” value as part of the test arrange steps:
[TestMethod]
public void MyTest()
{
    MyDomainTime.SetNow(() => new DateTime(2015, 11, 4, 8, 45, 12, DateTimeKind.Utc));
    var now = MyDomainTime.FromLocal("US/Pacific").Now();
    Assert.AreEqual(2015, now.Year);
    Assert.AreEqual(11, now.Month);
    Assert.AreEqual(4, now.Day);
    Assert.AreEqual(0, now.Hour); // should be the local hour, given the UTC-8 for this date
    Assert.AreEqual(45, now.Minute);
    Assert.AreEqual(12, now.Second);
    Assert.AreEqual(new TimeSpan(-8, 0, 0), now.Offset);
}
Note the use of UTC as the basis for any “now” comparison. This is important as internally, we should deal with only one timezone from which “local” is relative, and it helps that UTC doesn’t change with daylight saving. It’s not ideal to have methods exposed by the class that are only intended to be used in testing; however, it’s useful and important enough that I think it’s worth making the exception.
Beyond “now”
A lot of these examples deal with “now,” but you can imagine using a domain model to express any meaningful time values used in your business logic. You could have static methods or properties, where the time component/perspective is not important, e.g.,:
public static int CompanyYearOfIncorporation => 2013;
public static string MonthThatContainsAllTheMadness => "March";
and non-static methods or properties that do care about the time component:
public bool IsExpired(DateTime expirationDate)
{ /* ignore the time component of the input date and compare against midnight local time */ }
public DateTimeOffset StartOfTotalSolarEclipse();
In summary
The power of using a domain model for time is that it forces developers to think up front about what time values mean as they relate to the business problem at-hand. Later on, once the domain model is defined, it reduces the number of decisions that a developer has to make while coding. It contextualizes those decisions and abstracts them away from the level of minutes and hours and timezones and to the level of “application deadline” or “delivery date.” And by using a framework like this one these values are also testable.
A full project demonstrating this concept may be downloaded here: DomainTime Demo